Introduction
Detection of surface cracks is an important task in monitoring the structural health of concrete structures. If cracks develop and continue to propogate, they reduce the effective load bearning surface area and can over time cause failure of the structure. The manual process of crack detection is painstakingly time-consuming and suffers from subjective judgments of inspectors. Manual inspection can also be difficult to perform in case of high rise buildings and bridges. In this blog we use deep learning to build a simple yet very accurate model for crack detection. Furthermore we test the model on real world data and see that the model is accurate in detecting surface cracks in concrete and non concrete structures example roads. The code is open sourced on my Github at link.
Data set
For this blog, we are using the Publicly available Concrete Crack Images data set. This data set was made publicly available from the paper by Ozgenel and Gonenc.
The data set consists of 20,000 images of concrete structures with cracks and 20,000 images without cracks. The dataset is generated from 458 high-resolution images (4032×3024 pixel). Each image in the data set is a 227 x 227 pixels RGB image. Some sample images with cracks and without cracks are shown below:


As can be seen the data set has a wide variety of images — slabs of different colours, cracks of different intensities and shapes.
Model Build
For this problem, lets build a Convolution Neural Network (CNN) in Pytorch. Since we have a limited number of images, we will use a pretrained network as a starting point and use image augmentations to further improve accuracy. Image augmentations allow us to do transformations like — vertical and horizontal flip, rotation and brightness changes significantly increasing the sample and helping the model generalize.
For the steps below follow along with my code on Github.
Shuffle and Split input data into Train and Val
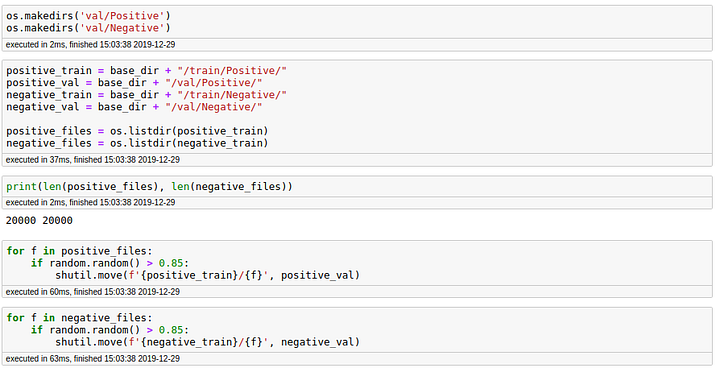
The data downloaded will have 2 folders one for Positive and one for Negative. We need to split this into train and val. The code snippet below will create new folders for train and val and randomly shuffle 85% of the data into train and rest into val.
Apply Transformations
Pytorch makes it easy to apply data transformations which can augment training data and help the model generalize. The transformations I chose were random rotation, random horizontal and vertical flip as well as random color jitter. Also the each channel is divided by 255 and then normalized. This helps with the neural network training.

Pretrained Model
We are using a Resnet 50 model pretrained on ImageNet to jump start the model. To learn more about ResNet models please read this blog from me. As shown below the ResNet50 model consists of 5 stages each with a convolution and Identity block. Each convolution block has 3 convolution layers and each identity block also has 3 convolution layers. The ResNet-50 has over 23 million trainable parameters. We are going to freeze all these weights and 2 more fully connected layers — The first layer has 128 neurons in the output and the second layer has 2 neurons in the output which are the final predictions.

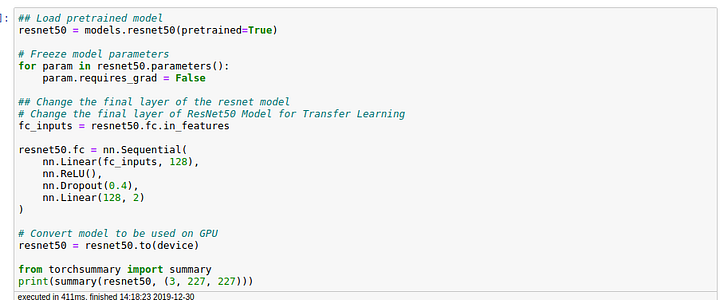
As shown by the model summary, this model has 23 Million non trainable parameters and 262K trainable parameters

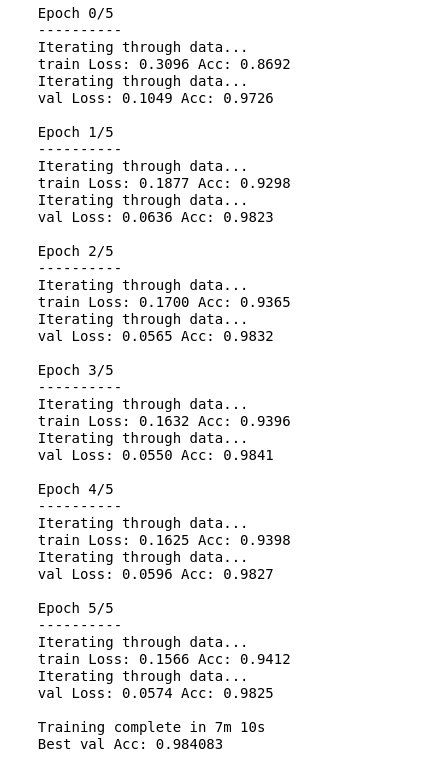
We used Adam as the optimizer and train the model for 6 epochs.
Model Training and Prediction on Real Images
We use transfer learning to then train the model on the training data set while measuring loss and accuracy on the validation set. As shown by the loss and accuracy numbers below, the model trains very quickly. After the 1st epoch, train accuracy is 87% and validation accuracy is 97%!. This is the power of transfer learning. Our final model has a validation accuracy of 98.4%.
Testing the model on Real World Images
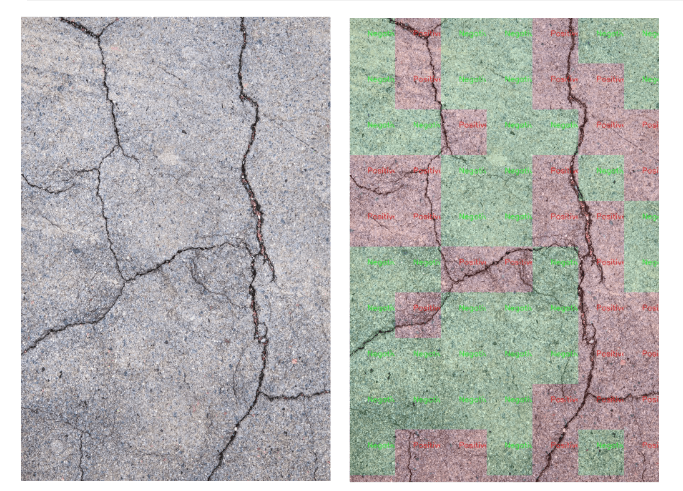
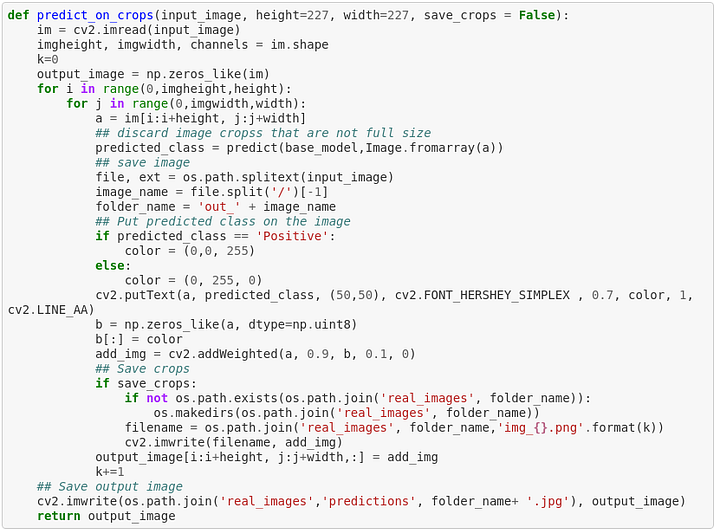
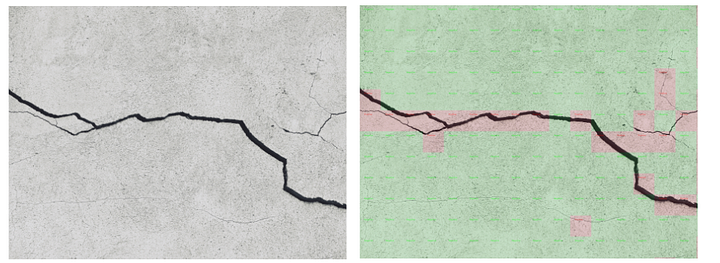
Now comes the most interesting part. Yes the model works on the validation data but we want to make sure it also works on unseen data from the internet. To test this, we take random images of cracked concrete structures and cracks in road surface. These images are much bigger than our training images. Remember the model was trained on crops of 227,227 pixels. We now break the input image into small patches and run the prediction on it. If the model predicted crack, we color the patch red (cracked) else color the patch green. The following code snippet does this.
The model does very well on images that it has not seen before. As shown in the image below, the model is able to detect a very long crack in concrete by processing 100s of patches on the image.
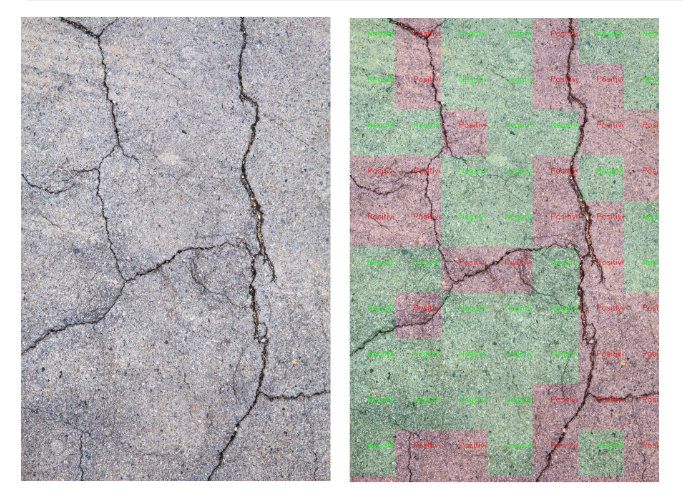
Further more I tested the model on road cracks too. This model was not trained on road surfaces but it does very well in picking road cracks too!
More real world images and model predictions on them are shared on the github link for this project.
Conclusion
This blog shows how easy it has become to build real world applications using deep learning and open source data. This entire work took half a day and outputs a practical solution. I hope you try the code for yourself and test it on more real world images.

